
티스토리 뷰ELK 8 을 이용한 SpringBoot Logback log관리Intro1. Pom.xml 설정2. Logback.xml설정3. JAVA 설치4. Elasticsearch 설치5. Kibana 설치6. Logstash 설치7. ILM을 사용하여 일정 기간마다 자동으로 인덱스 삭제 설정 7.1 Stack Management 클릭 > Index Lifecycle Policies > Create policy버튼 클릭8. ILM 정책 인덱스 템플릿 적용 8.1 Stack Management 클릭 > Index Management 클릭 > Index Templates 클릭 8.2 Create template 클릭 8.2 템플릿 생성 8.3 Component templates Next 8.4 Index settings (optional) 셋팅 8.5 Mappings (optional) Next 8.6 Aliasess (optional) Next 8.7 템플릿 생성
티스토리 뷰
Intro
Haproxy를 이용한 단말기와 통신을 Spring 어플리케이션인 SDK의 분산로그를 관리하기 위해 시스템 구성
1. Pom.xml 설정
<dependency>
    <groupId>net.logstash.logback</groupId>
    <artifactId>logstash-logback-encoder</artifactId>
    <version>8.0</version>
</dependency>
2. Logback.xml설정
<appender name="STASH" class="net.logstash.logback.appender.LogstashTcpSocketAppender">
	<destination>127.0.0.1:5000</destination>
	<!-- encoder is required -->
	<encoder class="net.logstash.logback.encoder.LogstashEncoder" />
</appender>

<root>
<level value="INFO"/>
    <appender-ref ref="FILE" includeLocation="true"/>
    <appender-ref ref="STDOUT"/>
    <appender-ref ref="STASH"/>
</root>
3. JAVA 설치
apt install gnupg ca-certificates curl -y

curl -s https://repos.azul.com/azul-repo.key | sudo gpg --dearmor -o /usr/share/keyrings/azul.gpg

echo "deb [signed-by=/usr/share/keyrings/azul.gpg] https://repos.azul.com/zulu/deb stable main" | sudo tee /etc/apt/sources.list.d/zulu.list

apt update

apt install zulu21-jdk -y
4. Elasticsearch 설치
#APT repository 추가
wget -qO - https://artifacts.elastic.co/GPG-KEY-elasticsearch | sudo gpg --dearmor -o /usr/share/keyrings/elasticsearch-keyring.gpg
apt-get install apt-transport-https
echo "deb [signed-by=/usr/share/keyrings/elasticsearch-keyring.gpg] https://artifacts.elastic.co/packages/8.x/apt stable main" | sudo tee /etc/apt/sources.list.d/elastic-8.x.list

#Elasticsearch 설치
apt-get update && apt-get install elasticsearch -y
--------------------------- Security autoconfiguration information ------------------------------

Authentication and authorization are enabled.
TLS for the transport and HTTP layers is enabled and configured.

The generated password for the elastic built-in superuser is : 123412341234

If this node should join an existing cluster, you can reconfigure this with
'/usr/share/elasticsearch/bin/elasticsearch-reconfigure-node --enrollment-token <token-here>'
after creating an enrollment token on your existing cluster.

You can complete the following actions at any time:

Reset the password of the elastic built-in superuser with
'/usr/share/elasticsearch/bin/elasticsearch-reset-password -u elastic'.

Generate an enrollment token for Kibana instances with
 '/usr/share/elasticsearch/bin/elasticsearch-create-enrollment-token -s kibana'.

Generate an enrollment token for Elasticsearch nodes with
'/usr/share/elasticsearch/bin/elasticsearch-create-enrollment-token -s node'.

-------------------------------------------------------------------------------------------------
##The generated password for the elastic built-in superuser is : 123412341234 나중에 필요함

# 데이타 디렉토리 생성
mkdir -p /data/ELK-DATA
chown -R elasticsearch:elasticsearch /data/ELK-DATA

#Elasticsearch path.data 경로 수정 및 셋팅
vi /etc/elasticsearch/elasticsearch.yml
path.data: /data/ELK-DATA
node.name: node-1
cluster.initial_master_nodes: [“node-1”]
network.host: 0.0.0.0
http.port: 9200

#ElasticSearch 실행
systemctl daemon-reload
systemctl enable elasticsearch
systemctl start elasticsearch

#Elasticsearch 동작 확인
##The generated password for the elastic built-in superuser is : 123412341234 필요하다던 비번
curl --cacert /etc/elasticsearch/certs/http_ca.crt -u elastic:123412341234 https://localhost:9200

#수퍼유저 elastic 비번 변경
/usr/share/elasticsearch/bin/elasticsearch-reset-password -u elastic -i
5. Kibana 설치
#Kibana 설치
apt-get update && apt-get install kibana

#Kibana 설정
vi /etc/kibana/kibana.yml
server.port 5601
server.host "0.0.0.0"
elasticsearch.hosts: ["https://아이피:9200"]

#Kibana 서비스 등록 및 실행
systemctl daemon-reload
systemctl enable kibana
systemctl start kibana

#Kibana token 발행
/usr/share/elasticsearch/bin/elasticsearch-create-enrollment-token --scope kibana

#브라우저 접속 http://아이피:5601하여 발행한 토큰값을 넣어준다.
#elasticsearch설치시 elastic계정의 바뀐 비번으로 로그인 한다.
# elastic / 바뀐 비번

#kibana kibana-verification-code 확인
/usr/share/kibana/bin/kibana-verification-code
Your verification code is:  000 000
6. Logstash 설치
#Logstash 설치
apt-get install logstash

#Logstash 설정
vi /etc/logstash/logstash.yml

#주석 제거
api.http.host: 0.0.0.0

#spring boot에서 전달한 로그 처리
vi /etc/logstash/conf.d/app-log.conf

input {
  tcp {
    port => 5000
    codec => json_lines
	type => app1
  }

  tcp {
    port => 5001
    codec => json_lines
	type => app2
  }
}

filter {
  ruby {
    code => "event.set('index_day', event.get('@timestamp').time.localtime('+09:00').strftime('%Y-%m-%d'))"
  }
}

output {
  if [type] == "app1" {
    elasticsearch {
        ilm.enabled: true
        hosts => ["http://아이피:9200"]
        index => "app1-%{index_day}"
        user => "elastic"
        password => "Elasticsearch 설치시 바꾼 비번"
        ssl_certificate_verification => false
    }
  }

    if [type] == "app2" {
        elasticsearch {
        ilm.enabled: true
        hosts => ["http://아이피:9200"]
        index => "app2-%{index_day}"
        user => "elastic"
        password => "Elasticsearch 설치시 바꾼 비번"
        ssl_certificate_verification => false
    }
  }
}

#Logstash 실행
systemctl daemon-reload
systemctl enable logstash
systemctl start logstash

#Logstash configuration 테스트
sudo -u logstash /usr/share/logstash/bin/logstash --path.settings /etc/logstash -t
Configuration OK
[2025-02-08T00:04:03,484][INFO ][logstash.runner          ] Using config.test_and_exit mode. Config Validation Result: OK. Exiting Logstash
7. ILM을 사용하여 일정 기간마다 자동으로 인덱스 삭제 설정
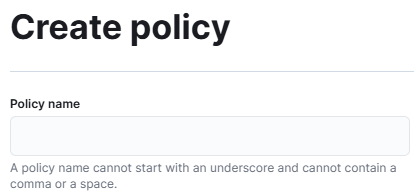
7.1 Stack Management 클릭 > Index Lifecycle Policies > Create policy버튼 클릭
- Policy name[정책 이름 입력]
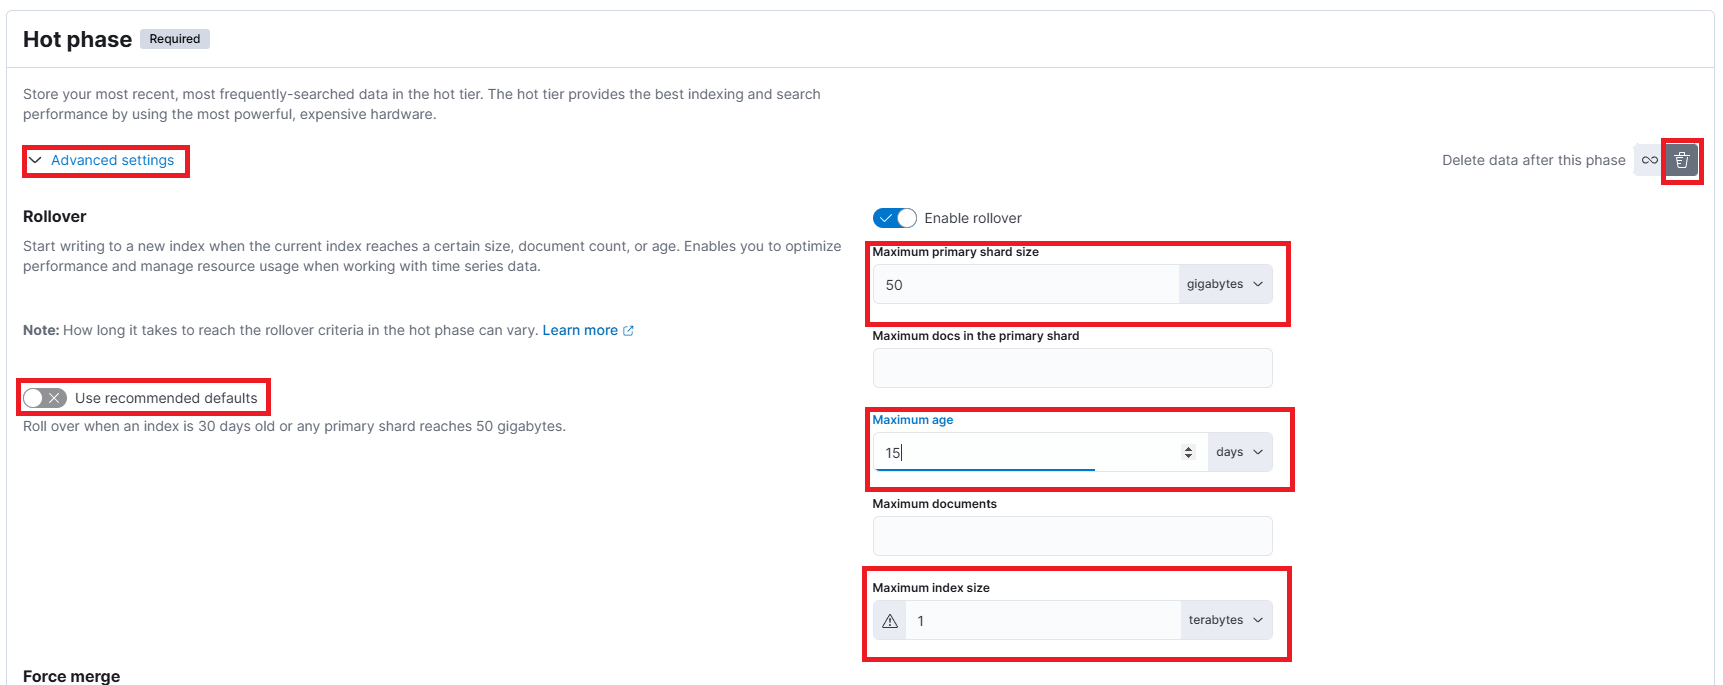
- Hot phase 설정 > Advanced settings 클릭
- Advanced settings 클릭
- Use recommended defaults 해제
- 왼쪽 인덱스의 사이즈와 보관기간 설정
- 왼쪽 상단 Delete data after this phase 휴지통 모양으로 변경
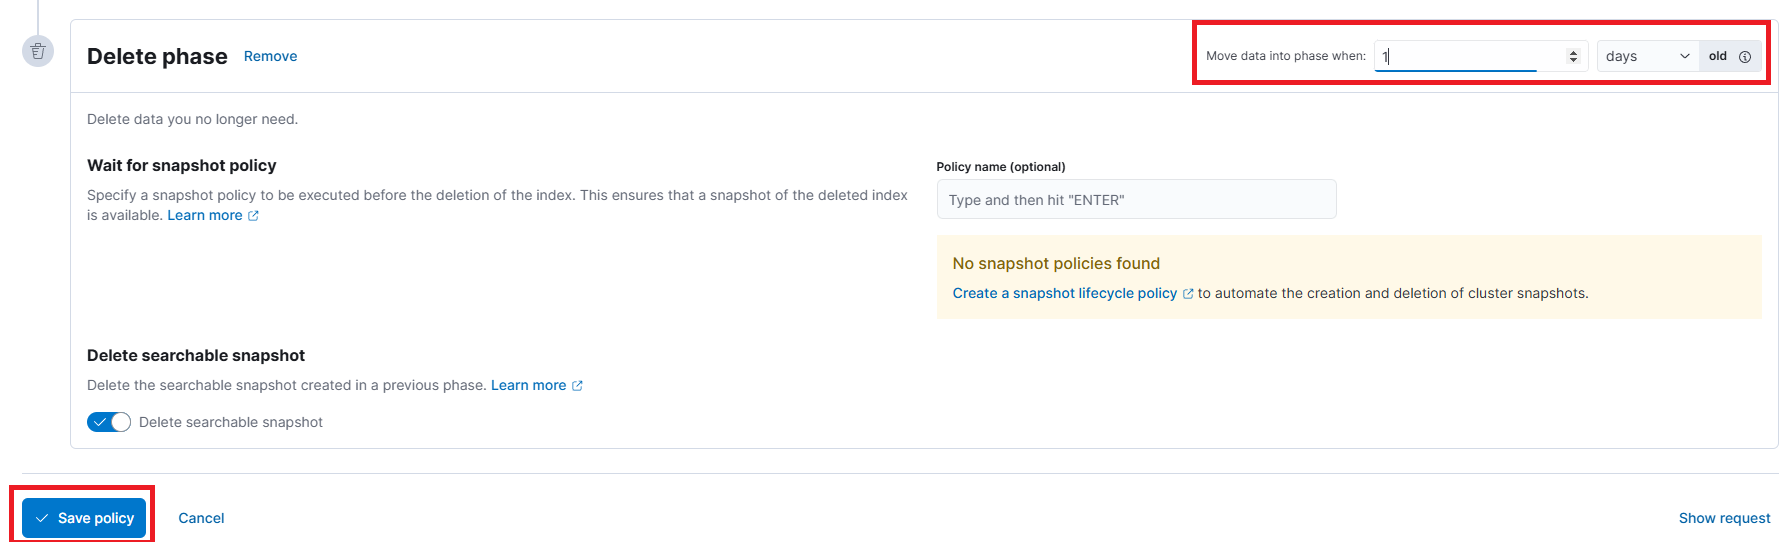
- Delete phase 설정
- Move data into phase when 설정
- Save policy 저
8. ILM 정책 인덱스 템플릿 적용
8.1 Stack Management 클릭 > Index Management 클릭 > Index Templates 클릭

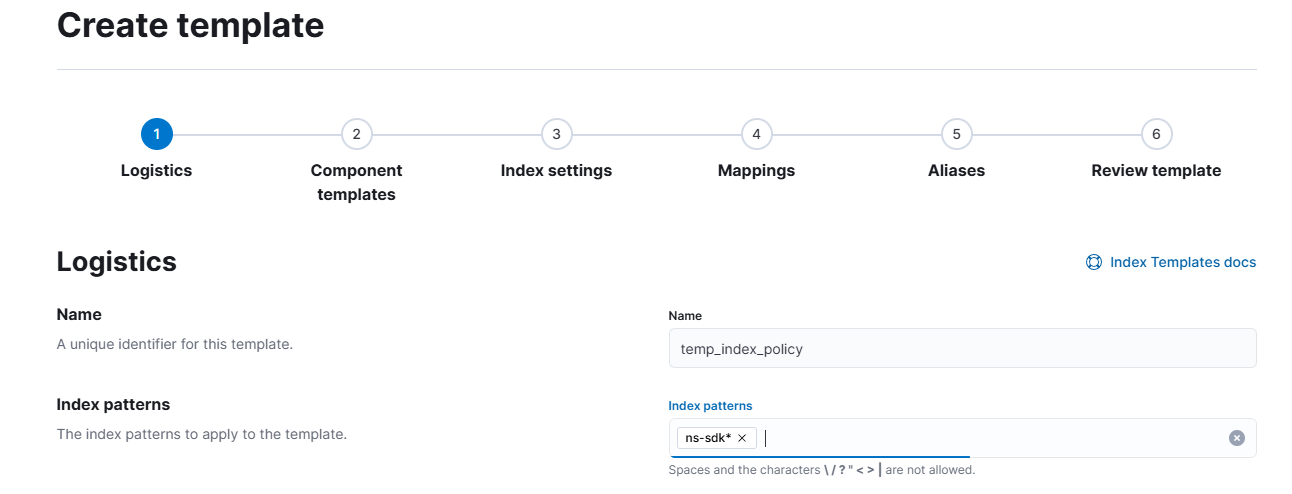
8.2 Create template 클릭

8.2 템플릿 생성
- 템플릿명 설정
- 인덱스 패턴설정
- Data Stream > Create data steram체크 해제
- Next 버튼 클릭
8.3 Component templates Next
8.4 Index settings (optional) 셋팅
{
    "index": {
        "lifecycle": {
        	"name": "temp-index-policy"
        }
    }
}
8.5 Mappings (optional) Next
8.6 Aliasess (optional) Next
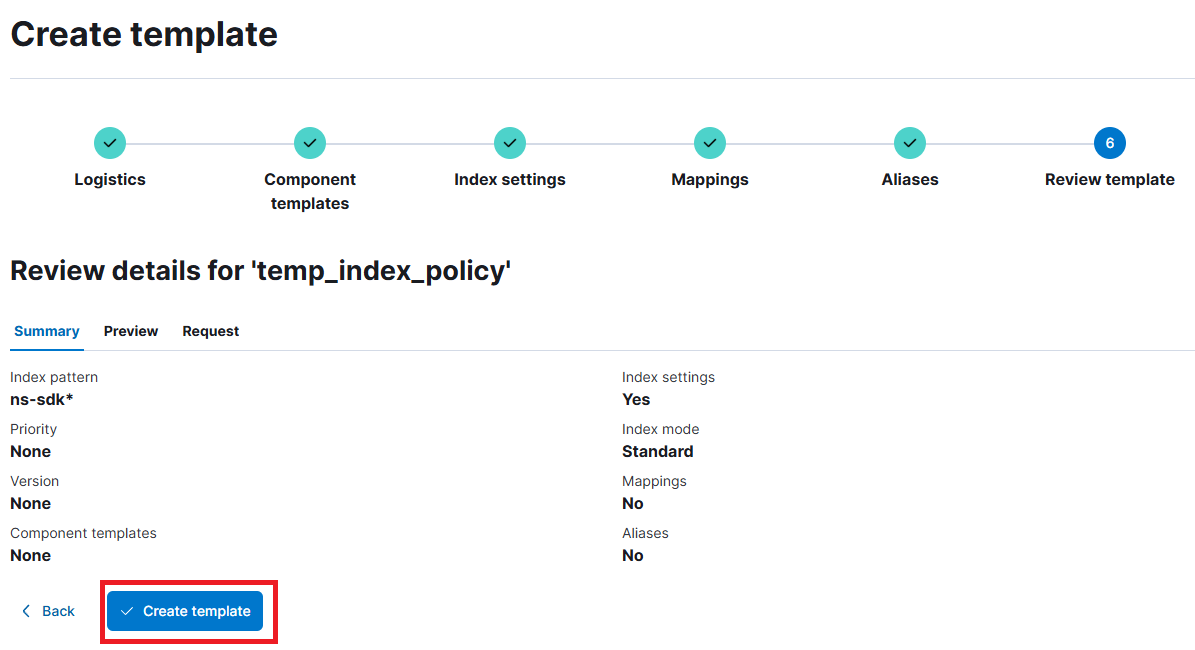
8.7 템플릿 생성
9. 참고
https://www.elastic.co/guide/en/elasticsearch/reference/current/set-up-lifecycle-policy.html
Configure a lifecycle policy | Elasticsearch Guide [8.17] | Elastic
When you enable index lifecycle management for Beats or the Logstash Elasticsearch output plugin, the necessary policies and configuration changes are applied automatically. You can modify the default policies, but you do not need to explicitly configure a
www.elastic.co
공지사항
최근에 올라온 글
최근에 달린 댓글
- Total
- Today
- Yesterday
링크
TAG
- elk8.x
- letencrypt
- 인증서자동갱신
- logstash
- Intellj들여쓰기
- SSL
- 마이바티스
- #logback
- 인증서설치
- camelcase
- Letsencrypt wildcard auto renew
- Letsencrypt+nginx
- nginx
- 마이바티스CamelCase
- Letsencrypt wildcard
- letsencrypt
- SSL인증서
| 일 | 월 | 화 | 수 | 목 | 금 | 토 |
|---|---|---|---|---|---|---|
| 1 | 2 | 3 | 4 | 5 | ||
| 6 | 7 | 8 | 9 | 10 | 11 | 12 |
| 13 | 14 | 15 | 16 | 17 | 18 | 19 |
| 20 | 21 | 22 | 23 | 24 | 25 | 26 |
| 27 | 28 | 29 | 30 |
글 보관함